ProRut is an excellent material for restoring tooth roots:
- simple application technique
- new tooth-colored formula
- biocompatibility
- water-based, good curing in humid environments
- absence of marginal permeability and prevention of bacterial invasion
- restoration of soft tissues without inflammation
Possessing unique properties and features, ProRut MTA has significant advantages over other materials for restoring root dentin:
Elimination of perforation of the bottom of the tooth cavity. Perforations as a result of clinical errors represent a communication between the dental cavity and periodontal tissues. ProRut MTA can seal perforations.
Elimination of root resorption. Internal root resorption as a result of an idiopathic condition manifests itself in the form of decay or destruction of root structures. The material can close defects during resorption.
- Retrograde filling of the root apex. Sealing the root apex is necessary in cases of endodontic treatment when a surgical (extraradicular) method is used. ProRuth MTA has excellent sealing ability and promotes periradicular healing as a retrograde filling material for apical root resection surgery.
- Protective pulp coating. In certain clinical situations, vital pulp treatment is indicated. Applying the material to the exposed pulp will in most cases result in healing and preservation of pulp vitality without additional treatment.
- Elimination of root perforations during endodontic treatment. Perforations as a result of clinical errors represent a communication between the root canal and periodontal tissues. ProRut MTA can close root wall perforations.
- Apexification. It is an excellent material for apexification because it seals the root tip, providing further sealing of the canal.
General overview
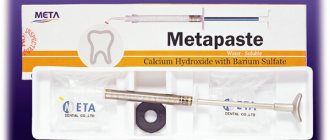
ProRoot MTA is a mineralized trioxide aggregate, crushed to the state of a fine hydrophilic powder.
In dentistry, this material is used as a protective cement during endodontic root canal treatment of teeth.
The peculiarity of the mass is its uniform solubility and hardening when interacting with liquid.
During the dissolution process, the powder first takes on the consistency of a homogeneous gel, which, when subsequently applied to the working area, hardens, creating a mechanical barrier that prevents damage and destruction of the walls of the root canals.
Operating principle and properties
The principle of action of the drug ProRut is the mechanical coating of the walls of the root canal, which leads to its restoration and prevents further destruction.
Thus, ProRoot is capable of sealing holes between periodontal tissues and the tooth cavity if it is necessary to treat dental perforations.
During the apexification procedure, the cementing material is able to isolate the apical part of the root, sealing the canal.
During the procedure for eliminating root resorption, ProRoot covers defects on the root surface , and during retrograde filling, it prevents moisture and bacteria from penetrating under the filling.
Additionally, ProRoot can be used to provide a protective pulp cap to restore tissue vitality.
Thus, the action of ProRut is multifunctional and can be used in various ways during treatment.
Use of MTA in general dental practice
Modern endodontics derives many benefits from the use of magnification, and especially the operating microscope. However, as a recognized expert in the field, I know that many general dentists do not have the luxury of this sophisticated technology. But dental telescopic lenses are available (photo 3), the price of which will suit all practicing dentists. Their ability to increase by 2-3 times is sufficient to perform various numerous procedures for the use of MTA cement in the root canals of teeth. The following examples illustrate techniques using MTA cement that can be implemented in general dental practice with minimal magnification.
Purpose of the drug
Indications for use are:
- filling the upper part of the tooth root;
- restoration of the integrity of the canal openings in the root and the role of a blocking element;
- during the channel update in the system during procedural treatment;
- used for direct pulp capping.
There are no restrictions or contraindications for use.
It is important to know:
- Containers with the drug Pro Root, intended for restorative operations of the root system of teeth, are prescribed to be stored in a place inaccessible to moisture, securely packaged and away from sunlight.
- The product must be applied immediately after mixing it with water to avoid dehydration during shrinkage.
- This material should be used no higher than the root of the tooth and pulp, because due to its natural characteristics it can give such an unpleasant effect as loss of color of tooth enamel.
Notes for use
A lack or excess of liquid reduces the strength characteristics of the cemented element. The material goes through a hardening cycle in four hours, but its use in work does not exceed five minutes. If you need more time to work, you should cover the mixed preparation with gauze, preventing moisture from leaving the treated area.
In conclusion, it is worth mentioning the choice of this drug as a means of restoring the integrity of a damaged root.
Having such properties as rapid hardening in the moist environment of the oral cavity, plasticity and ease of use, restoration of damaged tissue and even increased growth of new cells, the material becomes an excellent choice for dental operations on the tooth and its root system.
Pro Root also allows you to completely close access to a channel susceptible to perforation. Its direct purpose is to restore tissue inside the tooth when it is damaged and close access to the damaged area.
Indications and contraindications
The paste can be used to solve the following clinical problems:
- Sealing may be indicated when performing a resection of the upper part of the root.
- Protection. If the pulp is viable, applying ProRoot material to it can speed up the resolution of the inflammatory process and maintain the functionality of the pulp chamber without additional intervention.
- Elimination of perforations of dental cavities during endodontic treatment.
- Apexification.
The product has no contraindications, except in cases of individual intolerance to the drug.
Advantages of Prorut
Possessing unique properties, the material has a sufficient number of advantageous differences from its analogues:
- ease of use;
- high biological compatibility;
- hardening in an environment with high humidity;
- no inflammation of soft tissues during use.
It also performs a number of functions, such as:
- complete pulp closure;
- seals the upper part of the tooth and root, thereby ensuring complete closure of the defective area;
- Prorut applied to the pulp promotes faster and painless healing;
- forms renewed cement cells;
- reduces bacterial contamination compared to other similar materials;
- Thanks to its unique characteristics, it ensures complete and reliable hardening even in an environment with a high moisture content - treatment and renewal of the damaged tooth root.
Resistance to edge permeability
Creates a stable barrier against the penetration of bacteria and liquids - one of the key factors in the clinical success of the material for root dentin restoration. See diagrams 1 and 2. Diagram 2 shows the percentage of dye permeability when sealing perforations without blood (white bars) and with blood (red bars).
To reduce the risk of bacterial infection, the root dentin restoration material must block the communication pathways between the root canal system and adjacent tissues. Otherwise, bacterial migration occurs. Diagram 3 indicates the minimum size of the marginal gap between the sealing material and the root walls in comparison with analogues, which allows us to judge the progress of bacterial protection technologies.
Biocompatibility. Good clinical result
ProRut MTA promotes soft tissue healing without the stage of inflammation, including the formation of new cement cells on the restored root surface. ProRuth MTA has excellent biocompatibility with soft tissues. Documented histological studies have shown that ProRut MTA provides a good clinical response and successful outcome even with retrograde obturation of the root apex. Visual proof is in x-rays (see below, Fig. 1-8)
Curing in a humid environment
Humidity is not a problem
The water-based ProRut MTA cures well in a humid environment. In a clinical situation where complete moisture removal is not always possible, ProRut MTA, due to its ability to cure in a moist environment, is ideal as an effective root restoration material.
This is interesting: Allergic stomatitis in children and adults, symptoms, treatment
MTA from the beginning to the present day: material features and range of clinical applications
Over the past two decades, mineral trioxide aggregate (MTA) has become one of the most widely studied endodontic materials. MTA is composed of calcium, aluminum and selenium, and due to its specific structure, it has certain unique properties in terms of biocompatibility, bioactivity, hydrophilicity, radiopacity, compactability and low solubility.
For clinical use, the most important are its excellent biological and sealing characteristics. High biocompatibility of the material contributes to achieving successful results of endodontic treatment. According to histological examination, the use of MTA causes the formation of new cement in the periradicular area with a mild inflammatory reaction from the pulp, in which a new bridge of hard tissue is formed. Reliable compaction of the material is ensured due to the fact that its mechanical properties are similar to those of dentin. This minimizes the risk of microleakage and prevents bacterial invasion into the endospace. These factors are key to achieving clinical success during endodontic treatment. The practical advantage of MTA is that it cures in a humid environment. Upon contact with moisture, the calcium oxide contained in MTA is transformed into hydroxide. During this reaction, the pH of the material progressively increases, thereby increasing its antibacterial effect. However, unlike conventional calcium hydroxide, MTA is also characterized by very low solubility and dimensional stability after installation. MTA was obtained from Portland cement, but although these materials are similar in composition, they are not identical. MTA is further processed and purified, and is characterized by smaller particle sizes and an almost complete absence of toxic heavy metals.
From a historical perspective
MTA was first described in the dental literature in 1993, and was approved by the FDA in 1998. In 1999, ProRoot MTA (DENTSPLY Tulsa Dental Specialties) became the first commercially available MTA product in the United States market. MTA Angelus (Angelus/Clinician “Choice Dental Products Inc.”) was introduced in Brazil in 2001 and received FDA approval in 2011, after which it also became available in the United States.
MTA Angelus features reduced curing time, is sold in special containers that provide more controlled dispensing of material, and has the same properties as traditional MTA. Unlike the original MTA, which is sold in single-use packets, the new MTA Angelus is packaged in airtight bottles, allowing practitioners to extract only the required portion of the powder and use it in the required dosage only when needed. Traditional MTA cures in 2 to 3 hours, while MTA Angelus cures in 15 minutes after mixing. This reduction in curing time is sometimes very beneficial because within minutes of placing the MTA, clinicians can begin making restorations without worrying about the underlying material flowing. A similar effect of reducing hardening time was achieved due to a lower concentration of calcium sulfate. MTA is available in gray and white versions. The first MTA products were gray and most of the initial research was done on this material composition. Due to problems with crown staining due to exposure to the material, a new white version of the material was developed and introduced to the market in 2002. Despite this, manufacturers still recommend carefully monitoring the presence of residual material in the coronal part of the tooth. The difference between the gray and white versions of MTA is the concentration of iron, magnesium and aluminum oxides. Thus, white MTA has 90.8% less iron oxide than gray MTA. At first, doctors had some difficulty working with MTA due to its consistency, similar to wet sand, but over time, the principles of delivery and installation of MTA have improved and now this material is quite easy to work with.
Clinical Applications
More than 24 million endodontic procedures are performed each year in the United States, with microsurgical periapical procedures, perforation closure, and apexification procedures accounting for 5.5% of such procedures. Thanks to MTA, all these interventions have become more predictable and effective.
Pulp capping
When treating large carious lesions, partial exposure of the pulp is sometimes inevitable. Some experts refuse the procedure of direct pulp covering after its exposure, arguing that such interventions are unpredictable. At the same time, MTA has been demonstrating its effectiveness when used in such situations for more than one year. MTA is characterized by significantly lower solubility than conventional calcium hydroxide and significantly higher sealing properties. Thus, with its help, it is possible to tightly seal the pulp space, limiting the opportunities for microbial invasion from the outside. Studies have shown that in asymptomatic cases or in cases with reversible pulpitis (where the infection does not spread into the pulp space itself), the use of MTA is one of the promising treatment options. Data from histological studies indicate an almost complete absence of inflammatory reaction from the pulp during MTA installation, as well as the formation of a dentinal bridge. When using MTA Angelus, within 15 minutes the doctor is able to perform the final restoration of the carious defect, thus completing the tooth treatment in one visit.
Treatment of vital pulp (pulpotomy and apexogenesis)
In cases of irreversible pulpitis, where bacteria are already in the pulp chamber, one treatment option is to perform a pulpotomy procedure. This procedure is also part of a larger process - apexogenesis, since in this way we create the conditions under which the tooth root can complete its formation. It is logical that such an intervention can be carried out in teeth with incomplete root formation, when the pulp of the tooth root remains vital after infection of its coronal part. When installing MTA into the space of partially removed coronal pulp, odontoblasts will begin to differentiate and dentin will continue to be deposited in layers, thereby ensuring continued root development. Due to the deposition of dentin, the root will thicken and close at the apex, forming a natural apical narrowing. In the future, this condition of the root is more favorable for endodontic procedures and its high-quality obturation. Clinical procedure: After entering the pulp chamber, the clinician should use a diamond bur as this will cause cauterization of the tissue and minimize bleeding; then the cavity must be disinfected with sodium hypochlorite or chlorhexidine and rinsed with saline; hemostasis is achieved by light pressure from a moist cotton ball; the sediment is removed after 2 or 3 minutes, and the cavity is then ready to be filled with MTA.
Apexification
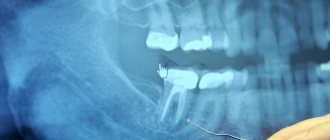
Treatment of necrotic pulp lesions in an immature root is quite difficult due to the lack of apical narrowing. Calcium hydroxide apexification may take several years to complete root formation. MTA is a fairly promising and predictable alternative, allowing the creation of a biocompatible apical plug in one visit. Clinical procedure: in the absence of periapical bone tissue (photo 1), a collagen / gelatin sponge (for example, Gelfoam, Pfizer Inc.) can be placed postapically to ensure installation of the MTA at the required working length (any other surgical resorbable sponges, such as OraPlug, can be used , Surgifoam or Surgispon [Aegis Lifesciences]). A small sponge segment (2 mm x 2 mm) is pushed past the apex using an endodontic file. After this, the MTA is packed along the entire length of the canal using a special cone corresponding to the size of the gutta-percha. For precise positioning, a rubber stopper can be installed on the gutta-percha pin (photo 2). Once the apical third of the canal is sealed with 3-5 mm of MTA, the remaining canal space can be filled with hot gutta-percha (Figure 3).
Photo 1. Pre-treatment radiograph showing apical bone loss.
Photo 2. Installation of MTA in the area of the apical third of the root.
Photo 3. X-ray after treatment.
Regeneration
When treating canals with incomplete root formation, the risk of iatrogenic fracture increases significantly, since the canal walls are too thin. Regeneration of the pulp-dentin complex is a modern treatment approach that includes disinfection of the root canals with a triple antibiotic paste, after which the process of tissue repair and regeneration is initiated. This ensures thickening of the canal walls due to the deposition of dentin-like structures. The question of how exactly the process of dentin deposition occurs remains the subject of further research. Clinical procedure: Pulp space regeneration is indicated for clinical cases with very thin dentinal canal walls and an open apical area with a diameter greater than 1 mm (Figure 4). Disinfection of the root canal system is carried out using sodium hypochlorite, and then a triple antibiotic paste is applied, which is left for 1 week.
Photo 4. X-ray before treatment: external root resorption.
On a second visit, the dentin walls are conditioned with ethylenediaminetetraacetic acid (EDTA), which induces the release of growth factors, and in the apical area, where the stem cells are located, it provokes bleeding in order to fill the pulp space with a stable blood clot, which will act as a biological scaffold. The MTA is then placed into the canal lumen in contact with the clot to protect it from coronal microleakage (Figures 5 - 6). Over time, the clot will be replaced by reparative tissue, and the root wall will thicken due to the deposition of dentin-like material (photos 7 - 8).
Photo 5. Determination of working length.
Photo 6. X-ray after treatment.
Photo 7. X-ray after 1 year: healthy condition of the surrounding bone tissue and continued root formation.
Photo 8. View 3 years after treatment.
Root perforation
Perforations are usually the result of iatrogenic interventions and involve the formation of an anastomosis between the pulp space and the periradicular tissues during access preparation or endodontic treatment. Perforations can also occur in cases of internal root resorption, when the entire thickness of the root is affected by the resorptive process. Due to its excellent compaction ability and biocompatibility, MTA can be successfully used to repair root perforations. Clinical procedure: Once the perforation has formed, the severity of the injury must be assessed. If there is an adjacent bone defect, it should be initially filled with osteoinductive material. This can be done with bone graft, calcium sulfate or collagen/gelatin sponge. The perforated part of the tooth should be restored using MTA (photo 9 - 14).
Photo 9. X-ray: presence of mesial perforation.
Photo 10. X-ray: presence of mesial perforation.
Photo 11. Restoration of MTA perforation, installation of calcium hydroxide into the root canal.
Photo 12. X-ray after treatment.
Photo 13. X-ray 2 years after treatment.
Photo 14. X-ray 2 years after treatment.
Filling the apex area
Retrograde root filling is carried out in cases of microsurgical interventions in the area for the purpose of treating endodontic pathology. In most cases, it is not possible to successfully seal the root retrogradely due to the complexity of the morphology of the endospace, however, MTA has sealing properties and biological activity that, in addition to complete sealing, also induce proliferation of cement cells, which, in turn, promotes healing in the wound area . Clinical procedure: in cases of retrograde filling (photo 15), it is necessary to remove the apical 3 mm of the root (photo 16), after which the endospace is cleaned with an ultrasonic tip to form a retrocavity (photo 17). After this, the cavity is dried, and the MTA is installed and condensed in the apical part of the tooth (photo 18 - 20).
Photo 15. X-ray before treatment.
Photo 16. Resection of the apical 3 mm of the root.
Photo 17. Retrograde preparation with an ultrasonic tip.
Photo 18. MTA retrofilling.
Photo 19. X-ray after treatment.
Photo 20. X-ray 6 months after treatment.
conclusions
Scientific studies have demonstrated the effectiveness of traditional MTA when used in a number of endodontic procedures. This article provides an analysis of MTA from the point of view of the history of its development, chemical composition and clinical use. In terms of clinical efficacy and biocompatibility, MTA has unique characteristics. By modifying the curing time, MTA-based products can be used in a variety of endodontic procedures to ensure successful dental treatment.
Authors: Peter Z. Tawil, DMD, MS, FRCD(C), Dipl. ABE Derek J. Duggan, BDentSc, MS, Dipl. A.B.E. Johnah C. Galicia, DMD, MS, PhD
Instructions for using ProRoot MTA:
Restoration of perforation after resorption
- After applying the Rubber Dam, clean the root canal of sawdust and half-life products, using root canal instruments and irrigating the canal with solutions containing NaOCI.
- Place a temporary filling to close access to the cavity.
- After one week of applying Rubber Dam, remove CaOH from the root canal system using root canal instruments and irrigating the canal with solutions containing NaOCI.
- Dry the canal with paper points and identify the root canal defect area.
- Perform obturation of all canals in the apical zone from the established defect area.
- Prepare the Prorut AM material according to the attached instructions.
- Using the supplied application probe, place the material into the defect area. Compact the ProRoot MTA material into the cavity using a small amalgam plunger and a cotton swab or paper points. Attention: You can condense the material using a large ultrasonic nozzle without spraying water, at medium power.
- Make sure you have placed the ProRuth MTA correctly using the x-ray. If an adequate barrier has not been created, wash the ProRut MTA material with water from the defect area and repeat the procedure.
- Place a moistened cotton swab into the cavity and seal the canal with temporary restorative material for at least 4 hours.
- After 4 hours, or during your next appointment, using Rubber Dam, inspect the ProRuth MTA material. The material must be hard. If it doesn't, wash it and reapply.
- Once the ProRoot MTA material has hardened, obturate the remaining portion of the canals. ProRuth MTA should remain as a permanent part of the root canal filling.
Repair of perforation of lateral root canals
- After applying the Rubber Dam, clean the root canal of sawdust and half-life products, using root canal instruments and irrigating the canal with solutions containing NaOCI.
- Dry the root canal system with paper points and isolate the perforation site.
- Obturate all canals located apical to the perforation.
- Prepare the Prorut AM material according to the attached instructions.
- Using the supplied application probe, place the material into the defect area. Compact the ProRoot MTA material into the cavity using a small amalgam plunger and a cotton swab or paper points.
- Make sure you have placed the ProRuth MTA correctly using the x-ray. If an adequate barrier has not been created, wash the ProRut MTA material with water from the defect area and repeat the procedure.
- Place a moistened cotton swab into the cavity and seal the canal with temporary restorative material for at least 4 hours.
- After 4 hours, or during your next appointment, using Rubber Dam, inspect the ProRuth MTA material. The material must be hard. If it doesn't, wash it and reapply.
- Once the ProRoot MTA material has hardened, obturate the remaining portion of the canals. ProRuth MTA should remain as a permanent part of the root canal filling.
Root apexification
- After applying the Rubber Dam, clean the root canal of sawdust and half-life products, using root canal instruments and irrigating the canal with solutions containing NaOCI.
- Dry the root canal system with paper points and place calcium hydroxide paste in the canal for a week to disinfect.
- After one week of applying Rubber Dam, remove CaOH from the root canal system using root canal instruments and irrigating the canal with solutions containing NaOCI. Dry the canal with paper points.
- Prepare the Prorut AM material according to the attached instructions.
- Using the supplied application probe, place the material into the defect area. Compact the ProRoot MTA material into the cavity using a small amalgam plunger and a cotton swab or paper points.
- Make sure you have placed the ProRuth MTA correctly using the x-ray. If an adequate barrier has not been created, wash the ProRut MTA material with water from the defect area and repeat the procedure.
- Place a moistened cotton swab into the cavity and seal the canal with temporary restorative material for at least 4 hours.
- After 4 hours, or during your next appointment, using Rubber Dam, inspect the ProRuth MTA material. The material must be hard. If it doesn't, wash it and reapply.
- Once the ProRoot MTA material has hardened, obturate the remaining portion of the canals. ProRuth MTA should remain as a permanent part of the root canal filling.
Root apex filling
- Provide access to the root apex and resect it using a surgical bur.
- Using an ultrasonic tip, prepare a Class I cavity to a depth of 3 to 5 mm.
- Isolate the work area. Dry the root cavity with paper points. Stop bleeding with a sealant sponge or other suitable material.
- Prepare the Prorut AM material according to the attached instructions.
- Using the supplied application probe, place the material into the defect area. Compact the ProRoot MTA material into the cavity using a small amalgam plunger and a cotton swab or paper points.
- Remove excess cement and clean the root surface with moistened gauze.
- Make sure you have placed the ProRuth MTA correctly using the x-ray. ProRuth MTA should remain as a permanent part of the root canal filling.
Pulp capping
- Using the Rubber Dam, complete the cavity preparation using burs at high speed with constant water spray.
- If caries is present, remove it using a round bur in the handpiece at low speed, or remove it using hand instruments.
- Rinse the cavity and surrounding area(s) with 2.6 – 5% NaOC1 solution. Bleeding can be controlled with a cotton swab moistened with sterile saline solution.
- Prepare the Prorut AM material according to the attached instructions.
- Using a small ball-tipped applicator or similar device, apply a small amount of ProRuth MTA to the exposed area.
- Remove excess moisture from the work area using a dampened cotton swab.
- Apply a small amount of glass ionomer light-curing liner material to cover ProRuth MTI and cure according to the manufacturer's instructions.
- Etch the remaining cavity surfaces with 34%-37% phosphoric acid gel for 15 seconds. Rinse thoroughly.
- Gently dry the cavity, leaving the dentin slightly damp but not wet. Apply adhesive. Cure according to instructions.
- Complete the restoration by applying composite material.
- At the patient's next visit, assess pulp vitality. The vitality of the pulp should be checked every 3-6 months using radiographs.
This is interesting: Tooth hurts after pulpitis treatment: reasons, what to do
Root apex filling
- Provide access to the root apex and resect it using a surgical bur.
- Using an ultrasonic tip, prepare a Class I cavity to a depth of 3 to 5 mm.
- Isolate the work area. Dry the root cavity with paper points. Stop bleeding with a sealant sponge or other suitable material.
- Prepare the material according to the included instructions.
- Using the supplied application probe, place the material into the defect area. Compact the material into the cavity using a small amalgam plunger and a cotton swab or paper points.
- Remove excess cement and clean the root surface with moistened gauze.
- Make sure you have the correct placement using the x-ray. The material should remain as a permanent part of the root canal filling.
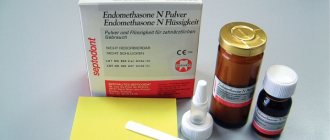
Instructions for mixing ProRut tooth root restoration material
Caution: ProRoot MTI does not cure as quickly as other cements. Careful mixing will make the material more flexible to use.
- Open the packet of ProRuth MTA material and place the material on the mixing pad.
- Tear off the tip of the microdose ampoule containing ProRut liquid and squeeze the contents onto a notepad next to the powder.
- Gradually mix the liquid into the cement using a ProRut MT-A mixing stick. Mix the material with the liquid for approximately 1 minute to ensure that all powder particles are moistened.
- If necessary (a spare ampoule is included or you can use distilled water), you can add 1-2 drops to mix the material to a creamy consistency. Discard any remaining liquid.
Note:
- Too little or too much liquid can reduce the strength of the cured material.
- ProRut MTA will harden within 4 hours, but working time is limited to 5 minutes. In case you need more working time, cover the mixed material with damp gauze to prevent evaporation.
Quantity:
5 x 1g. + 6 x 0.35g.
Filling the upper part of the tooth canal
The stages of filling include the following:
- Apply rubber dam, thoroughly clean the canal from sawdust and half-life products, using special tools to treat the space in the root and regularly spraying it with a liquid containing sodium hydrochloride.
- Carry out ultrasound treatment of the damaged cavity to the first class.
- Dry the area of the damaged tooth with special paper swabs and install it in the damaged area.
- Treat the channels in the nearest area against the detected defect.
- Prepare Prorut material in accordance with the instructions for use.
- Using a special dispenser-probe for placing Prorut from the supplied kit, apply Prorut to the area of the detected defect. Use a small plunger to compact the material into the damaged area, and also use paper and cotton swabs.
- Make sure that the drug has been placed correctly. An X-ray image will help you verify the correct placement of the Prorut. If it was not possible to create a strong barrier from the material, it must be washed with liquid from the damaged area and the application attempt must be repeated.
How is the drug used?
When restoring a tooth after destruction of bone tissue and restoring perforation in the dental system:
- Apply a rubber dam, thoroughly clean the canal of excess objects, such as sawdust, using special tools to treat the space at the root of the tooth and regularly spraying it with a liquid containing sodium hydrochloride.
- Place a filling temporarily, blocking access to the damaged area of the tooth.
- A week later, after applying coffidam, extract CaOH from the root system, also spraying it with liquid containing sodium hydrochloride.
- Dry the area of the damaged tooth with special paper swabs and install it in the damaged area.
- Carry out obturation treatment of the root area in the closest area to the detected defect.
- Prepare the cementing material in accordance with the instructions for use.
- Using the application probe included in the kit, apply Pro Root to the area of the identified tooth defect. Use a small plunger to compact the mixture into the damaged area, and also use paper and cotton swabs.
- Make sure that the drug has been placed correctly. An X-ray image will help you verify the correct placement of the Prorut. If it was not possible to create a strong barrier from the material, it must be washed with liquid from the area of the damaged tooth and the application attempted again.
- Place a swab moistened with water into the formed canal in the tooth and fill it with materials for restoration work for a period of four hours.
- As soon as the four-hour period has passed, or during the next lesson, using a rubber dam, inspect the Prorut material. It must harden to the required state. If the composition does not harden, wash the material and reapply it.
- If the mixture has successfully hardened, treat the rest of the cavity. The drug Prorut should become a permanent filling in place of the defective area of the tooth.
You can use an ultrasonic nozzle to apply the material, turning it on at medium power. Spraying the solution in this case is not necessary.
Restoration of resorption
The procedure includes the following steps:
- Using a rubber dam, finish the work in the cavity using burs at high speeds with constant wetting with water.
- Install the filling temporarily.
- After a week from the date of surgery, extract CaOH from the tooth and carry out the necessary treatment.
- Rinse the cavity and its surrounding area with a five percent solution of sodium hydrochloride. If bleeding occurs, it should be controlled using a cotton swab treated with a sterile solution.
- Prepare Pro Root as prescribed in the instructions.
- Taking a miniature applicator with a ball-shaped nozzle, apply a small amount of the mixture to the exposed area.
- Dry excess moisture in the work area using cotton wool.
- Mix.
- Using the supplied probe, apply the drug to the operated area.
- Use x-rays to verify correct placement.
- Fill the cavity and place a tampon on it.
- During the subsequent procedure, check the degree of hardening. If it has not completely hardened, clear the channel of it and apply it again.
Creating a Pulp Barrier
To create a reliable pulp barrier, you must adhere to the following rules:
- Using a rubber dam, finish the work in the tooth cavity using burs at high speeds with continuous wetting with water.
- If caries has been detected, work should be carried out to remove it using a round bur at low speeds, or remove it manually using appropriate tools.
- Rinse the cavity and its surrounding area with a five percent solution of sodium hydrochloride. If bleeding occurs, it should be controlled using a cotton swab treated with a sterile solution.
- Prepare Prorut in accordance with the instructions in the instructions.
- Taking a miniature applicator with a ball-shaped nozzle, apply a small amount of Prorut to the exposed area.
- Dry excess moisture in the work area using cotton wool.
- Apply cushioning material, creating a coating for the drug, and carry out polymerization in accordance with the instructions in the instructions for it.
- Etch the remaining surface of the treated area with a 37% phosphoric acid solution for fifteen seconds. Then carefully treat the etching area.
- Drain the cavity as delicately and carefully as possible; the dentin should remain slightly moist. Then carry out polymerization.
- Restoration work is completed by applying a Spectrum-type composite, or using any analogue suitable for the parameters.
- At the patient's next visit, the condition of the pulp is assessed. Regular checks of her condition and vitality should be carried out every three months, monitoring her condition using data obtained from x-rays.
Useful tips
It is necessary to strictly adhere to the ratio of powder and liquid specified in the instructions. Excess or lack of moisture reduces the strength of the hardened material.
To avoid dehydrogenation, ProRut should be introduced into the operating area immediately after mixing.
Curing occurs in 4 hours. The working time with the composition during standard use does not exceed 5 minutes. If more time is required, you need to cover the mixed composition with moistened gauze.
To avoid discoloration of the tooth crown , the material should only be used in root canals or at the bottom of the pulp chamber.
ProRut MTA should be stored in a dry place, hidden from direct sunlight, with the lid tightly closed.
Advantages and disadvantages
Among the positive aspects noted by dentists who have experience working with ProRoot are:
- The tightness of the material prevents the spread of pathogenic microorganisms and the penetration of moisture into the root canal. The density of the structure helps maintain a hygienic condition and also stimulates the restoration of the root area;
- The likelihood of drug rejection is low, due to the use of components that do not cause an allergic reaction in the body;
- Polymerization even in conditions of high humidity, which is important when restoring areas where the use of a rubber dam is associated with certain difficulties.
Among the disadvantages characteristic of ProRut, it is worth noting the need to quickly use the diluted composition, since the material hardens within five minutes from the moment of mixing. At the same time, violation of operating technology associated with excessive addition of liquid that interferes with hardening is not a problem, since removing the paste from the cavity of dental tissue is not particularly difficult.
Indications and contraindications
ProRoot is used to solve dental problems such as:
- Sealing the resection site of the apical root part of the tooth;
- Protection of the pulp in the presence of inflammatory processes;
- Elimination of perforation areas during endodontic treatment;
- Apexification.
The only factor limiting the use of the paste is intolerance to the components included in the composition.
Kneading rules
The use of the drug is not associated with technical difficulties, but requires compliance with basic precautions. The algorithm looks like this:
- The contents of the opened package are poured into a separate sterilized container;
- The liquid from the bottle is squeezed out next to the powder;
- The fractions are mixed for 60 seconds;
- The resulting consistency should be evenly moist;
- If necessary, liquid from the second capsule or distilled water is added to the composition in a minimal proportion.
Thorough stirring of the paste ensures pliability during application and uniform hardening.
Nuances of use
Despite the existence of general principles of technology for using the ProRut material, each individual clinical case requires a special approach to the procedure.
Let's consider the main nuances of work when performing various tasks.
Perforation restoration
When performing a perforation repair procedure, it is important to ensure that the installed material is positioned adequately and that it hardens after installation.
During treatment, several control images using x-rays may be required, as well as reinstallation of poorly “adhered” material.
A detailed description of the procedure for restoring perforation can be found in the article above.
Pulp capping
There are the following features of the pulp capping procedure:
- A light-curing material is applied on top of the applied ProRut material, which is illuminated in accordance with the technology proposed by the manufacturer.
- Dentin cavities are etched for 15 seconds using phosphoric acid. After pickling, everything is thoroughly washed.
- Then, everything is dried so that the dentin remains slightly damp, but not excessively. An adhesive is applied to the dental tissue and illuminated in accordance with the technology.
- The procedure ends with the application of a composite material.
After the procedure is completed, the patient is scheduled for another appointment, during which the vitality of the pulp is assessed.
Root apexification
- Rubber dam application.
- Treatment of the canal with boron, cleaning of sawdust and decay products, disinfection with NaOCI, drying with paper points.
- Placement of a disinfectant composition (calcium hydroxide) into the canal.
- Weekly break.
- Extraction from the canal (Ca(OH)2, disinfection of the cavity with NaOCI, drying with paper points.
- Mixing ProRut.
- Injection of material into the defect area, compaction using a plunger. (Condensation of the material can also be done using an ultrasonic nozzle).
- Verification using radiography of the correct application of ProRut.
- Place a moistened cotton swab on the ProRoot and place a temporary filling on top of it.
- Control of material hardness (check no earlier than after 4 hours).
- Obturation of the free part of the canal.
This is interesting: How an injection is given during dental treatment: modern methods of pain relief
Apical closure in one visit
There are many literature sources describing the technique of apexification using Ca(OH)2. Calcium hydroxide can be used to induce apexification in unformed apices or in apices destroyed by pathological processes. Using Ca(OH)2 is time consuming. In some cases, treatment takes up to two years, including repeated replacements of this material in the root canals. If the patient does not come to one of the follow-up visits, the method may fail.
MTA cement has been successfully used for apexification in one visit. The tooth is restored almost immediately. This is an excellent technique, suitable for both children and adults, as the following case demonstrates.
An adult girl aged 18 years had previously undergone root canal treatment on a central incisor. There was swelling and tenderness on the vestibular side. The crown was going to be replaced with a new one, but an x-ray showed that the filling material in the large-diameter root canal was undercondensed and the apex was wide open. The root canal was accessed. Gutta-percha was removed by Hedstrom files. After determining the length of the canal with X-ray confirmation, it was found that the apical region has a diameter of more than 120 according to the ISO standard - this is too large a diameter for controlled gutta-percha obturation.
The root canal is generously irrigated with sodium hypochlorite solution and minimally shaped to give the canal space a conical shape. Due to time constraints, no other work was performed at the first visit. The canal was filled with a preparation based on calcium hydroxide Ultracal, a cotton ball and a temporary filling made of IRM material were applied.
A week later, the canal was reopened (pain and vestibular swelling had disappeared) and the calcium hydroxide preparation was removed. To create a plug from MTA cement, we used a straight large diameter (diameter 1.20 mm) transfer tool from the MAP kit. Particular attention was paid to the position of the transporter in the apical region. During the insertion of the approximately 2 mm thick MTA plug, the tip of the vector was positioned at a distance of 1–2 mm from the root exit. Two or three portions of MTA introduced this time can be condensed using Dovgen pluggers of appropriate sizes. It was observed that the last portion did not reach the radiographic length of the root by approximately 1.5 mm. A brief exposure to ultrasound (5 sec) on the surface of the MTA cement using the ProUltra No5 ultrasonic attachment (Dentsply) displaced the material by the missing millimeters and led to its perfect position at the root.
A wet paper point was placed in the canal, the access cavity was closed with a cotton ball and a temporary filling made of IRM cement. The patient was asked to return later in the day (after four or more hours had passed) to ensure the hardness of the MTA cement. As expected, he became hard as a rock. The remaining part of the canal above the MTA cement was filled with thermoplastic gutta-percha using the Obtura system (Spartan Obtura).
Three months later, the tooth was asymptomatic and the periapical lesion had disappeared. Now you can install a new crown.
Root apex filling
- Provide access to the apical zone of the root using suitable burs.
- Rubber dam application.
- Treatment of the canal using an ultrasonic nozzle.
- Dry the canal with paper points; if there is blood in the canal, it should be removed with a sponge.
- Mixing ProRut.
- Introduce material into the apical zone using the included probe.
- Compact the ProRut with a plunger, remove excess material, clean the channel surface with damp gauze.
- Checking the correct filling of the root apex with material using radiography.
Creating a Pulp Barrier
To create a reliable pulp barrier, you must adhere to the following rules:
- Using a rubber dam, finish the work in the tooth cavity using burs at high speeds with continuous wetting with water.
- If caries has been detected, work should be carried out to remove it using a round bur at low speeds, or remove it manually using appropriate tools.
- Rinse the cavity and its surrounding area with a five percent solution of sodium hydrochloride. If bleeding occurs, it should be controlled using a cotton swab treated with a sterile solution.
- Prepare Prorut in accordance with the instructions in the instructions.
- Taking a miniature applicator with a ball-shaped nozzle, apply a small amount of Prorut to the exposed area.
- Dry excess moisture in the work area using cotton wool.
- Apply cushioning material, creating a coating for the drug, and carry out polymerization in accordance with the instructions in the instructions for it.
- Etch the remaining surface of the treated area with a 37% phosphoric acid solution for fifteen seconds. Then carefully treat the etching area.
- Drain the cavity as delicately and carefully as possible; the dentin should remain slightly moist. Then carry out polymerization.
- Restoration work is completed by applying a Spectrum-type composite, or using any analogue suitable for the parameters.
- At the patient's next visit, the condition of the pulp is assessed. Regular checks of her condition and vitality should be carried out every three months, monitoring her condition using data obtained from x-rays.
Root apexification
Root apexification is performed using a technology similar to the procedure for restoring perforation.
The procedure consists of placing calcium hydroxide into the apical part of the tooth and covering the root apex with ProRoot material.
As a result of this, cement-like tissue is formed on teeth with non-viable pulp and the root tissue is gradually restored.
In the video, watch the technique of mixing and sealing root canals with ProRoot paste.
Sources:
- https://www.vash-dentist.ru/lechenie/zubyi/plombyi/proroot-nadezhnaya-zashhita.html
- https://dentart.org/?p=1172
- https://dentazone.ru/preparaty-oborudovanie/materialy/proroot-mta.html
- https://El-dent.ru/id/pro-rut-mta-dentsply.html
- https://www.pharmgeocom.ru/assortment/detail2786.html
- https://zubovv.ru/lechenie/zubyi/plombyi/kak-rabotaet-pasta-proroot-mta.html
Use of MTA material in surgical endodontics
Among the adult population of Russia, the prevalence of caries is 95-98%. Quite often, if it is not treated adequately, complications arise (pulpitis, periodontitis), leading to the need for surgical treatment to save teeth. This applies to complications such as perforation and poor-quality filling of root canals, when it is impossible to eliminate these complications endodontically.
In such situations, the problems of choosing filling materials and instruments for obturation of perforations and high-quality retrograde filling of the root canal come to the fore.
The materials used must meet the requirements, namely: be biocompatible with surrounding tissues, not dissolve, have good adhesion to the tissues of the tooth root even in a humid environment, and most importantly, prevent the “leakage” of microorganisms and their decay products into the periapical tissues.
It is known that previously amalgam was most widely used for these purposes, but due to rapid shrinkage, the presence of corrosive products, poor adhesion, the inability to work in wet conditions, the difficult formation of a cavity for filling, and staining of surrounding tissues, its use was abandoned.
Today, the most commonly used materials in clinical practice include the following: gutta-percha, zinc oxide cements, composites, glass ionomer cements and mineral trioxide aggregate (MTA).
Over the past 8 years, MTA (mineral trioxide aggregate) material has been proposed for retrograde filling.
In vitro and in vivo analysis showed that MTA reliably prevents microleakage, provides good biocompatibility, and stimulates tissue regeneration when MTA comes into direct contact with the pulp or periapical tissues. In addition to its effectiveness in retrograde filling of teeth, MTA has shown excellent results in the treatment of pulpitis, for the formation of the apex of the tooth, in surgical and non-surgical methods for eliminating perforations (Fig. 1). Comparative characteristics of MTA with other filling materials distinguish it favorably in all clinical and paraclinical parameters from the known materials used in the practice of endodontic dental treatment (Torbinejad et al. 1998, etc.).
Rice. 1. Scheme of application of MTA material
The principle of the chemical compound in MTA is based on tricalcium oxide, tricalcium aluminate, tricalcium silicon and silicic acid. The powder contains hydrophilic particles, which, in the presence of moisture or blood, form a colloidal gel, creating a strong impenetrable barrier. The material is completely biocompatible with tissues and has no contraindications for use. Moreover, a decrease in inflammation around the root surface filled with MTA and the formation of cement on it have been experimentally proven. The drug consists of powder and capsules of distilled water. Due to the disposable packaging of the powder, the sterility of the material and accurate dosage are ensured. The material is radiopaque.
The inconveniences associated with mineral trioxide aggregate are most often due to its performance characteristics:
- it is difficult to dose the amount of liquid when mixing the drug and placing it in the tooth cavity;
- the preparation is not dense, which creates difficulties during thrombosis of the filling mass;
- it is impossible to treat the bone cavity with liquid without washing off the preparation;
- curing time is from 2 to 4 hours.
Taking into account all the listed disadvantages, a set of retrograde nozzles and syringes was developed for working with MTA (Fig. 2).
Traditional preparation of the root apex with a round bur on an angled or straight handpiece is currently falling out of use, giving way to ultrasonic systems for a number of reasons. In them, due to the minimum length of the working part of the retrograde nozzle, it is possible to maintain parallelism of the cavity walls when removing a small section of the surrounding bone, without performing a steep resection angle of the root apex. Reducing the resection angle to 45-30° leads to the opening of a small number of dentinal tubules, which, in turn, increases the guarantee of successful treatment.
The first ultrasonic devices appeared in dentistry in 1954 and were intended to form cavities in the hard tissues of teeth. Ultrasonic scalers convert electrical energy into mechanical vibration energy of the working part of the tip. We used the SUPRASSON P5 BOOSTER device (manufactured by SATELEC) (Fig. 3).
Rice. 2. Type of syringes for working with MTA
Rice. 3. SUPRASSON P5 BOOSTER device (manufacturer SATELEC)
The shape of the working part is selected depending on the clinical situation. In this case, to implement non-invasive treatment methods, a set of ProUltra attachments was used, proposed (Fig. 4).
Rice. 4. Diamond tips used for retrograde filling
The big advantage of using these working nozzles is the simplicity and reliability of cavitation expansion of the channel due to diamond sputtering. They also make it possible to perform resection using an ultrasonic tip. But, despite this, when working with an ultrasonic tip, the rules for working with the device and all the principles of endodontics must be observed.
To avoid any problems during retrograde filling using ultrasonic expansion, the following conditions must be observed:
- The tips of the tip must be sharp and, for reliability, fully match the thickness of the root. It is advisable to start preparing a small hole at the mouth of the canal without water cooling. Due to the fact that the SUPRAS-SON P5 BOOSTER device can control the preparation speed, it is necessary to start work at a reduced speed. Recommended speed settings are from 5 to 9.
- The pressure when working with the tip should be minimal. This will prevent microfractures in the root of the operated tooth, as well as the possibility of breaking off the working part of the nozzle.
- When the air system operates for a long time, it is necessary to wash the wound to remove tissue debris and cool the top of the instrument. Moreover, this procedure reduces the frictional energy with the root surface, which, as a number of studies have shown, causes a damaging effect due to vibration.
- The prepared tooth root cavity should be periodically dried with suitable paper adsorbents or an air stream from an irrigator/air duct needle inclined at an angle of 27-30°.
After fixing the working part of the tip on the resected surface of the root apex in the area of the root canal orifice, it should not be displaced, and the cavity should be formed to the required depth and shape. In order to avoid perforation, it is necessary to adhere to the direction of the length of the tooth axis, and move from top to bottom.
Once the desired depth has been achieved, the cavity at the apex must be dried. The cavity formation is assessed using retromirrors.
After the cavity is formed and dried, retrograde filling is performed. Problems associated with the inconvenience of using MTA were solved by using a set of syringes, as well as special pluggers developed by Dentsply Maillefer for working with MTA (Fig. 5). Various sizes of syringes and rubber carriers on pluggers allow you to reliably obturate the cavity for filling. The rounded end on the back surface of the plugger allows you to compact the MTA from above. In order to achieve complete filling of the formed cavity without pores, it is necessary to repeat this procedure 7-9 times. It is recommended to remove the remaining material using a damp swab without rinsing the cavity under pressure.
Rice. 5. Stoppers for retrograde filling
Currently, according to a large number of studies in endodontic surgery, MTA is the most optimal filling material as a material used for retrograde filling and elimination of perforations. However, as noted above, its technical application is associated with a number of difficulties. However, the use of new technologies in the form of ultrasonic devices, syringes and pluggers greatly facilitate all manipulations. Therefore, the MTA material and a set of additional instruments can be recommended in an outpatient dental surgery clinic.
Grigoryants L. A., Doctor of Medical Sciences, Professor, Vadalyan V. A., Ph.D. Grigoryants A. G. Department of outpatient surgery Moscow, TsNIIS